Clam AntiVirusのメモリ使用量が多すぎる
Clam AntiVirusはLinux向けのウイルス対策ソフトの中では珍しく無料で利用することができるため、多くのLinuxサーバで採用されています。
当サイトでは定期的なウイルスチェックだけでなく、postfixと連動させてメールのウイルスチェックにも利用しています。clamdというデーモンを利用すれば安価なVPSのリソースでも、一日数万件のメールチェックもこなすことができます。
優秀なclamdですがデメリットもあります。高速に動作させるためメモリ上にウイルス定義ファイルを展開する必要があります。しかもリアルタイムチェックを行うには常時起動しておく必要があります。このウイルス定義ファイルは日々更新され肥大化し続けています。昔は2~300MB程度でしたが、2020年現在では850MBにもなります。使用していないときにはスワップメモリへ優先的に回されますが、それでも巨大です。
いくらメモリの価格が下がったとはいえ、サーバのリソースは有限です。大量のメールをさばくならまだしも、一日に数十通のメールをやり取りするために、これだけのリソースを消費するのは割が合いません。海外のフォーラムではClam AntiVirusのメモリ消費をなんとか減らせないかという質問が散見されます。
それらの回答はいつも「メモリを増やせ。できないなら停止しろ。」という無慈悲な正論ばかり。
かといってこのご時世にウイルスチェックなしにメールを受け取る勇気もありません。
そこで代替サービスはないかと探して見つけたのが今回紹介するSophos Anti-Virus for Linuxです。アンチウイルスソフトを比較するサイトで詳しく解説されていますが、動作も高速で、メモリ消費が1/5程度に抑えられます。
ということで、メールのウイルスチェックをClam AntiVirusからSophos Anti-Virus for Linuxへ変更する方法を解説します。
Sophos Anti-Virus for Linuxのダウンロードとインストール
yumでサクッとインストールしたいところですがSophosの公式ページで登録を済ませてからダウンロードする必要があります。
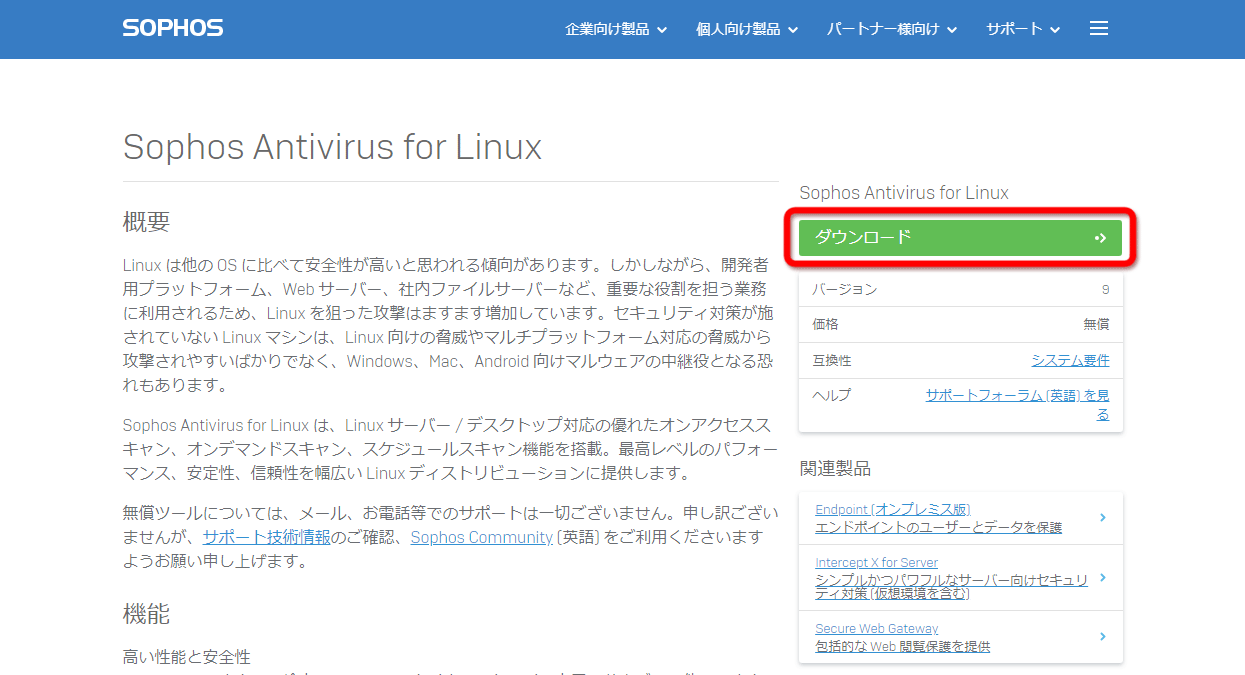
Sophosの公式ページにアクセスしてダウンロードボタンをクリック。
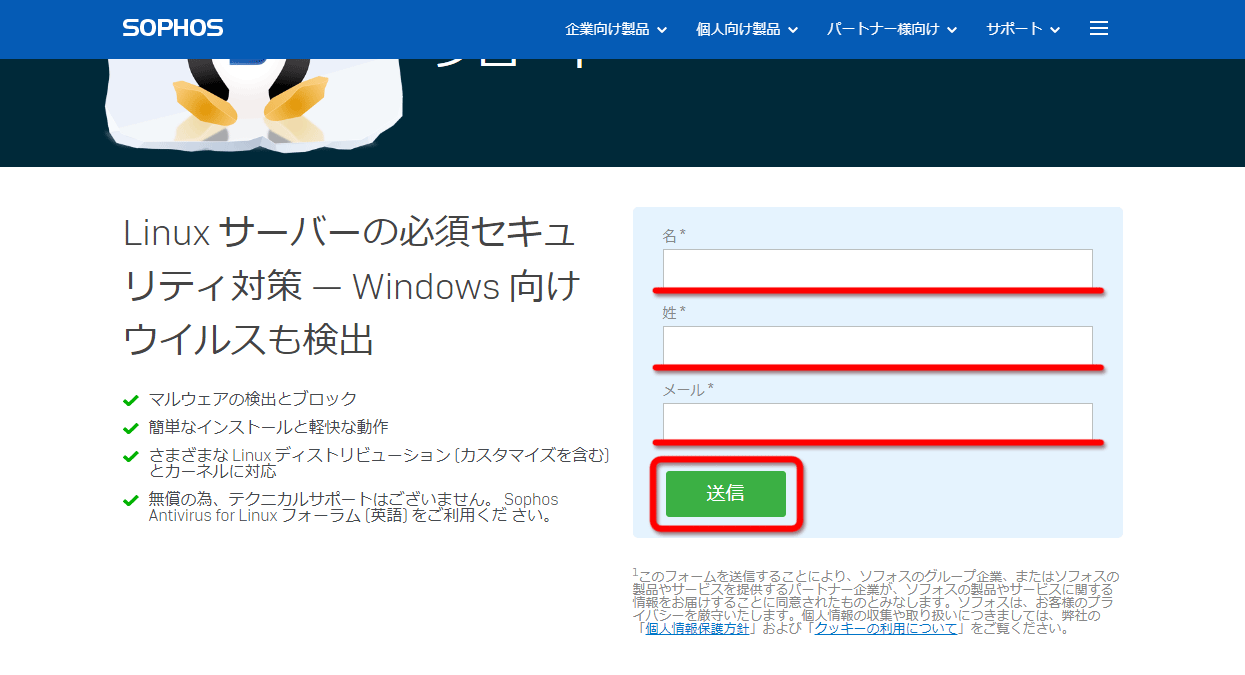
ペンギンマークのページで、「名」「性」「メール」を入力して「送信ボタン」をクリック。
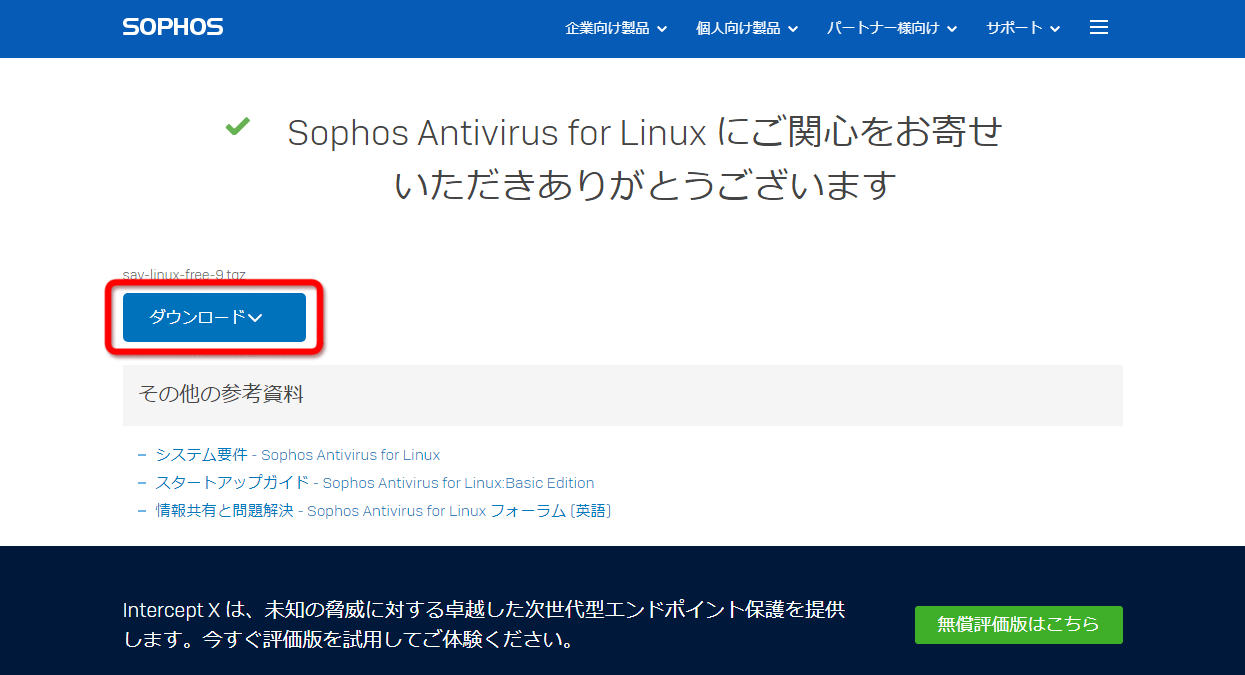
ダウンロードリンクが表示されるのでクリック。
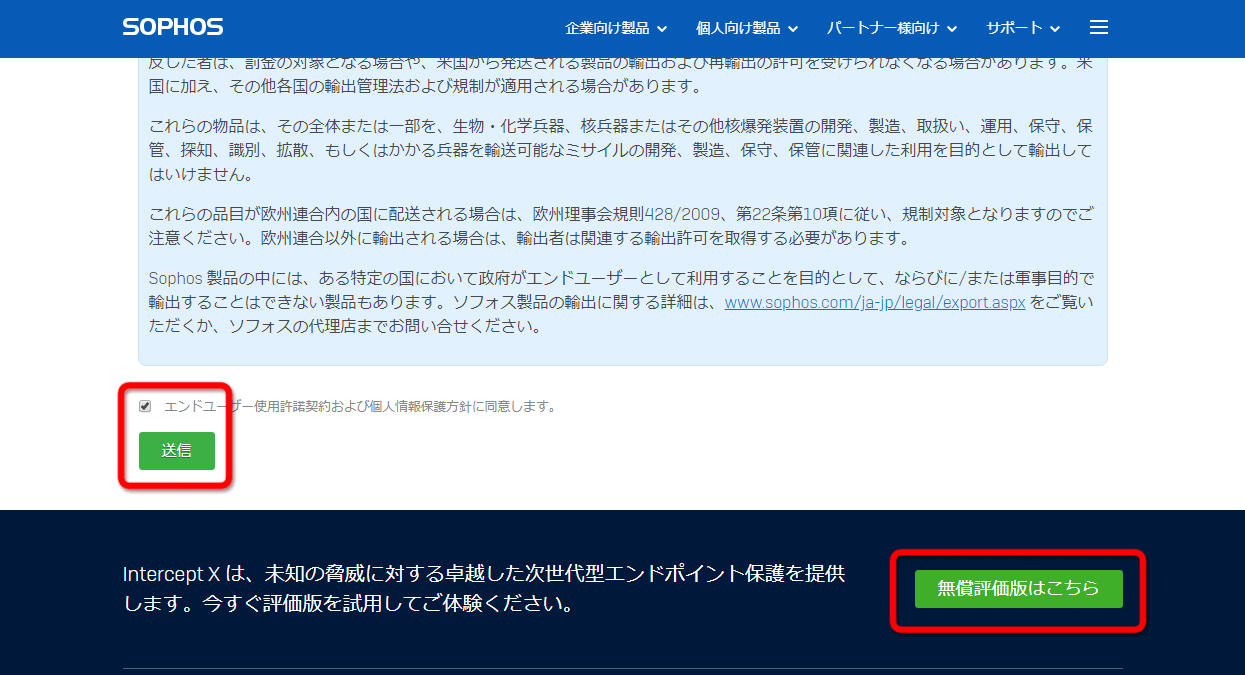
「エンドユーザー使用許諾契約および個人情報保護方針」なるものを読んだらチェックボックスにチェックを入れて「送信」ボタンをクリック。
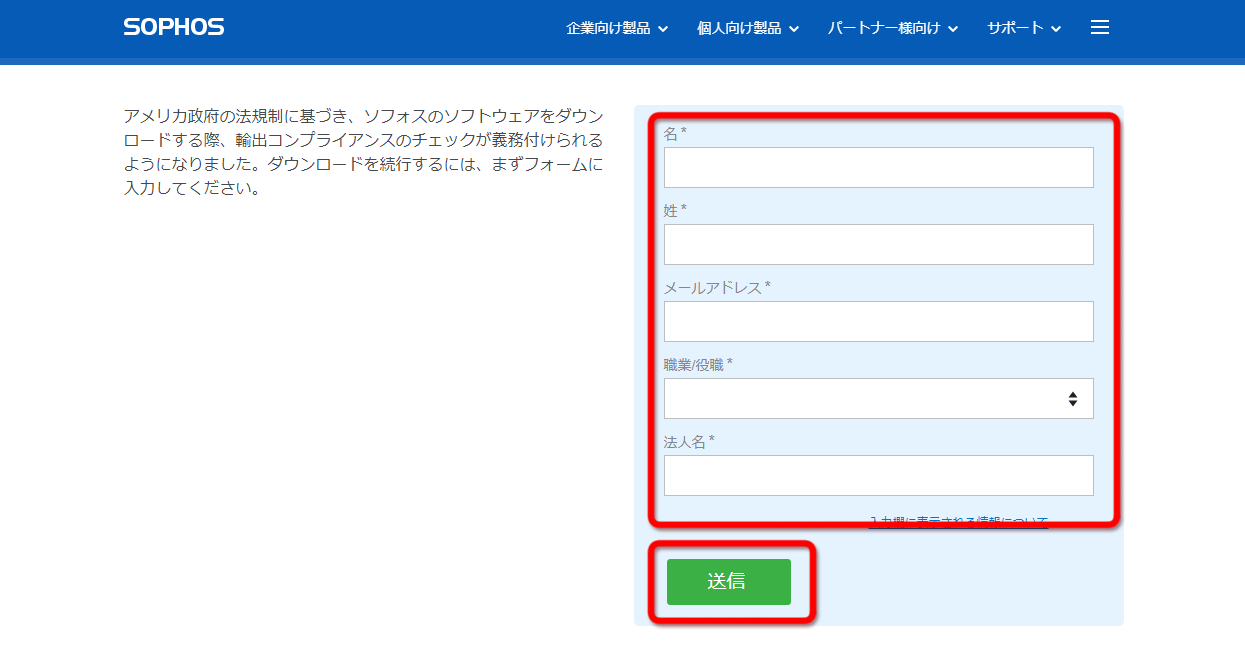
「ソフトウェア輸出コンプライアンス」ページで再度署名をします。「名」「姓」「メールアドレス」「職業/役職」「法人名」。さらには業種なども表示されますが適当に入力しておきましょう。
Free Editionの利用は個人向けに限るので、職業役職では「個人利用者」を選びましょう。
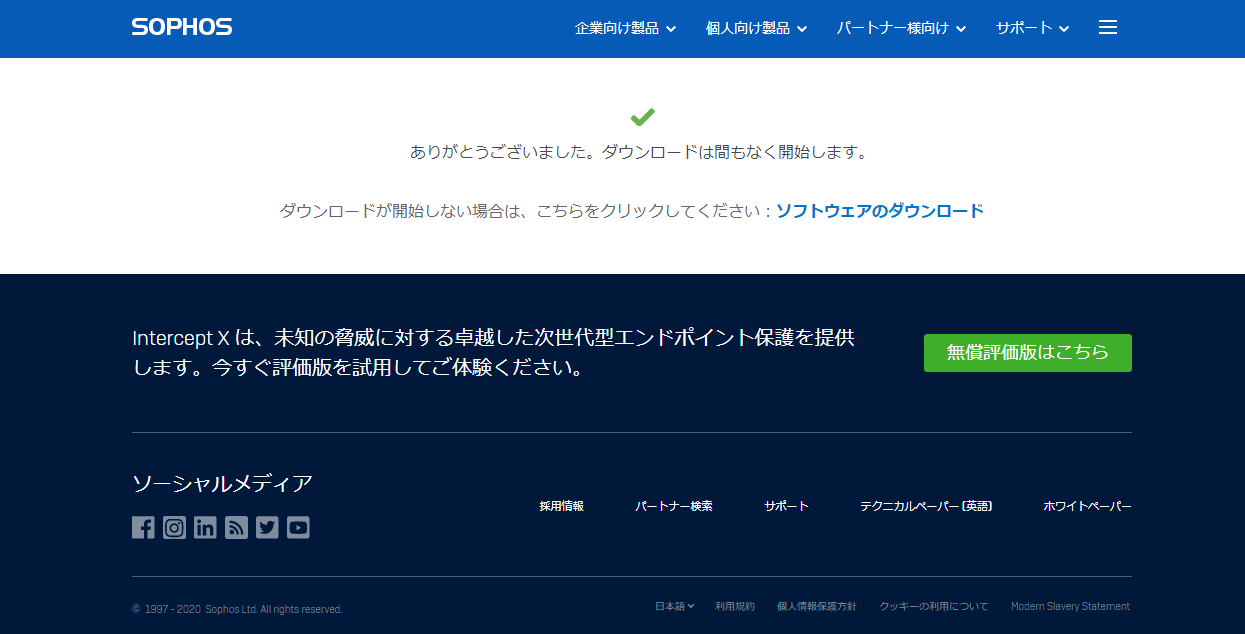
するとダウンロードが開始される由のページが表示されるので待ちます。
全部で352MBあるのでコーヒーでも飲みながら待ちましょう。
私のダウンロードした時点でのファイル名は「sav-linux-free-9.tgz」というものでした。
インストールの実行にはroot権限がいるので、/rootディレクトリへファイルをコピーし、展開します。
# tar -zxvf sav-linux-free-9.tgz
するとsophos-avというディレクトリが作成されているので、ディレクトリを移動します。
# cd sophos-av
ここにあるinstall.shというファイルを実行するとインストールが開始されます。
すると長々と設問が続くので入力していきます。
# sh install.sh Sophos Anti-Virus ================= Copyright 1989-2019 Sophos Limited. All rights reserved. Welcome to the Sophos Anti-Virus installer. Sophos Anti-Virus contains an on- access scanner, an on-demand command-line scanner and the Sophos Anti-Virus daemon. On-access scanner Scans files as they are accessed, and grants access to only those that are threat-free. On-demand scanner Scans the computer, or parts of the computer, immediately. Sophos Anti-Virus daemon Background process that provides control, logging, and email alerting for Sophos Anti-Virus. Pressto display Licence. Then press to scroll forward. ここでエンター ********************************* NOTICE This Sophos software contains software licensed by Sophos as well as software licensed by other parties. Some software license terms may grant You rights with respect to such software (including distribution rights) which are in addition to those rights granted to You by Sophos with respect to this Sophos product in the Sophos End User License Agreement. Please review the Copyright section of product documentation for further details regarding Your rights to any such software which has been provided to You and to view the respective copyright notices. ********************************* SOPHOS END USER LICENSE AGREEMENT & PRIVACY POLICY Use of this software is subject to the Sophos End User License Agreement (EULA): https://www.sophos.com/en-us/legal/sophos-end-user-license-agreement.aspx You must accept the EULA to continue, so please read it carefully. You also acknowledge that Sophos processes personal data in accordance with the Sophos Privacy Policy: https://www.sophos.com/en-us/legal/sophos-group-privacy-policy.aspx --More-- エンター押してくと読みすすめることができます。 次の設問時にYesにしないとインストールが中止されます。そのため連打はせずに一行ずつ表示しながら進めてください。 (省略) * The licence and distribution terms for any publically available version or * derivative of this code cannot be changed. i.e. this code cannot simply be * copied and put under another distribution licence * [including the GNU Public Licence.] */ I accept the Sophos End User License Agreement and acknowledge the Sophos Privacy Policy. Yes(Y)/No(N) [N] > y (ここでyとしないとInstallation aborted.と出て失敗します。) Where do you want to install Sophos Anti-Virus? [/opt/sophos-av] > (コマンドのインストール場所。変更する必要はないのでそのままエンター) Do you want to enable on-access scanning? Yes(Y)/No(N) [Y] > y(オンアクセス検索を有効にするか。ファイルの作成や保存時にファイルをチェックしてくれるリアルタイムスキャン機能です。無効にする場合でも後で利用する際に必要なファイルがインストールされない可能性があるのでyで進めます。nの検証はしていません。) Sophos recommends that you configure Sophos Anti-Virus to auto-update. It can update either from Sophos directly (requiring username/password details) or from your own server (directory or website (possibly requiring username/password)). Which type of auto-updating do you want? From Sophos(s)/From own server(o)/None(n) [s] >(アップデートサーバの経由先を指定。通常はSophosからインストールするのでs。ただしデフォルトがsなのでそのままエンター) Updating directly from Sophos. Do you wish to install the Free (f) or Supported (s) version of SAV for Linux? [s] > f (インストールするバージョンの指定。Freeバージョンか、サポートを受けられるバージョンか) The Free version of Sophos Anti-Virus for Linux comes with no support. Forums are available for our free tools at http://openforum.sophos.com/ Do you need a proxy to access Sophos updates? Yes(Y)/No(N) [N] > n (プロキシ経由のアップデートを行うか) Fetching free update credentials. Installing Sophos Anti-Virus.... Selecting appropriate kernel support... Starting Sophos Anti-Virus daemon: [ OK ] Installation completed. Your computer is now protected by Sophos Anti-Virus.
以上でSophos Anti-Virus for Linuxのインストールは完了です。
出力から分かる通り、Sophos Anti-Virus daemonがインストール時点で起動しています。
Sophos Anti-Virus for Linuxの設定と使い方
Sophosはコマンドラインで設定を変更します。
インストール時に指定した/opt/sophos-avにあるコマンドを利用します。このコマンドベースの設定方法のことをSophos Enterprise Consoleと呼ぶようです。
ちなみにファイルベースの設定も可能ですが、そうするとコマンドでの設定ができなくなります。
コマンドについては公式の「Sophos Anti-Virus for Linux/UNIX: 開始と停止のコマンド」というページでまとめられています。
ここでいったん単語の整理をします。
Sophosには「オンアクセス検索」と「オンデマンド検索」という機能が用意されています。
「オンアクセス検索」とは
ウイルスの感染を未然に防ぐ機能で、ファイルを開いたり保存した時点でウイルスを検知する機能です。
いわゆるリアルタイムスキャン機能です。デーモンとして常時動作するためWebサーバには向きません。不特定多数の利用するファイルサーバといった用途に向いていると思います。
オンアクセス検索を有効化するには以下のコマンドを打ちます。(無効化はdisable)
/opt/sophos-av/bin/savdctl enable
オンアクセス検索を開始するには以下のコマンドです。(停止はstop)
/etc/init.d/sav-protect start
ちなみにオンアクセス検索で動くプロセス名はsavscanというものです。
「オンデマンド検索」とは
ユーザーが指定したファイルやディレクトリのウイルス検査をする方法です。
必要なときに必要なファイルだけを検査するのでリソースの消費も最小限で済みます。
今回はこの機能を利用してメールのウイルスチェックを行います。
使い方は以下の通り。savscanというコマンドに繋げてディレクトリやファイルを指定するだけです。
# savscan /home/hoge
オンデマンド検索のプロセス名はsweepです。
Sophosの各種動作確認方法
まずはすでに動作しているSophosのログを見てみます。
# /opt/sophos-av/bin/savlog

Time                             Category         Event
Sun 01 Mar 2020 07:38:20 AM UTC: savd.daemon      Sophos Anti-Virus daemon started.
Sun 01 Mar 2020 07:38:29 AM UTC: savd.daemon      On-access scanning enabled using talpa.
Sun 01 Mar 2020 07:38:29 AM UTC: savd.scanner.log The threat data is out of date and should be updated.
Sun 01 Mar 2020 07:45:09 AM UTC: update.failed    Failed to replicate from sdds:SOPHOS
Sun 01 Mar 2020 07:45:09 AM UTC: update.failed    Failed to replicate from all update sources
savd.daemonというオンアクセス検索(on-access scanning)のプロセスが有効になっていて、アップデートが失敗しているようです。
続いてステータスの確認を行います。
# /opt/sophos-av/bin/savdstatus

Sophos Anti-Virus is active and on-access scanning is running
間違いなくオンアクセス検索が有効になっています。
なれないコマンドでの確認だけだと不安なのでtopも叩きます。
# top
  PID USER      PR  NI  VIRT  RES  SHR S %CPU %MEM    TIME+  COMMAND
 3758 root      20   0  958m 281m 8284 S  0.0 15.0   0:10.22 savscand
 3771 root      20   0  882m 279m 8212 S  0.0 14.9   0:09.56 savscand
オンアクセス検索のsavscandが2つ実行されています。
これはメインのプロセスと、そのスレッドです。複数のスレッドで同時並行的にウイルスチェックをするようです。スレッドの数はオプションで変更できるようです。
実メモリ消費量は280MB程度です。Clam AntiVirusのclamdに比べると半分以下です。
インストール時の設定ではオンアクセス検索を有効にしましたが、実際には使わないので停止します。
# /etc/init.d/sav-protect stop
# /etc/init.d/sav-rms stop
ちゃんと停止したか調べるには以下の通り。
# /etc/init.d/sav-protect status
Sophos Anti-Virus daemon is inactive

# /etc/init.d/sav-rms status
Sophos Remote Management Service is inactive
起動項目へ登録されているか調べます。
# chkconfig --list | grep sav-protect
sav-protect     0:off   1:off   2:on    3:on    4:on    5:on    6:off
どうやら自動で有効になっています。
ということで自動起動を無効にします。これも専用のコマンドで行います。
# /opt/sophos-av/bin/savdctl disableOnBoot savd
再度調べます。
# chkconfig --list | grep sav-protect
何も表示されなければオンアクセス検索の自動起動は無効になっています。
Amavisの導入
続いてAmavisを導入します。Amavisはメーラーとウイルス対策ソフトを繋ぐソフトです。
今回はメーラーとしてPostfix、ウイルス対策ソフトとしてSophosを繋ぐために利用します。今や珍しいPerlで書かれていますが、yumで入るので手間なしです。
Amavisのインストール
AmavisはEPELでamavisd-newというパッケージ名で配布されています。早速yumでインストールします。
# yum install --enablerepo=epel amavisd-new

Dependencies Resolved

================================================================================
 Package                       Arch      Version                  Repository
                                                                           Size
================================================================================
Installing:
 amavisd-new                   noarch    2.9.1-3.el6              epel    836 k
Installing for dependencies:
 altermime                     x86_64    0.3.10-3.el6             epel     52 k
 arj                           x86_64    3.10.22-22.el6           epel    149 k
 cabextract                    x86_64    1.5-1.el6                epel     41 k
 clamav                        x86_64    0.100.3-1.el6            epel    1.3 M
 clamav-db                     x86_64    0.100.3-1.el6            epel    150 M
 clamd                         x86_64    0.100.3-1.el6            epel    243 k
 db4-cxx                       x86_64    4.7.25-22.el6            base    589 k
 db4-devel                     x86_64    4.7.25-22.el6            base    6.6 M
 freeze                        x86_64    2.5.0-11.el6             epel     27 k
 gdbm-devel                    x86_64    1.8.0-39.el6             base     26 k
 json-c                        x86_64    0.11-13.el6              base     27 k
 libmspack                     x86_64    0.6-0.1.alpha.el6        epel     68 k
 lzop                          x86_64    1.02-0.9.rc1.el6         base     50 k
 nomarch                       x86_64    1.4-6.el6                epel     18 k
 p7zip                         x86_64    16.02-10.el6             epel    662 k
 p7zip-plugins                 x86_64    16.02-10.el6             epel    976 k
 perl-Archive-Tar              x86_64    1.58-144.el6             base     74 k
 perl-Archive-Zip              noarch    1.30-2.el6               base    107 k
 perl-Authen-SASL              noarch    2.13-3.el6               base     52 k
 perl-BerkeleyDB               x86_64    0.43-3.el6               epel    159 k
 perl-Convert-ASN1             noarch    0.22-1.el6               base     43 k
 perl-Convert-BinHex           noarch    1.119-10.1.el6           base     43 k
 perl-Convert-TNEF             noarch    0.17-10.el6              epel     20 k
 perl-Convert-UUlib            x86_64    2:1.6-1.el6              epel    221 k
 perl-Crypt-OpenSSL-Bignum     x86_64    0.04-8.1.el6             base     34 k
 perl-Crypt-OpenSSL-RSA        x86_64    0.25-10.1.el6            base     37 k
 perl-Crypt-OpenSSL-Random     x86_64    0.04-9.1.el6             base     22 k
 perl-DBD-SQLite               x86_64    1.27-3.el6               base     83 k
 perl-DBI                      x86_64    1.609-4.el6              base    705 k
 perl-Digest-HMAC              noarch    1.01-22.el6              base     22 k
 perl-Digest-SHA               x86_64    1:5.47-144.el6           base     65 k
 perl-Digest-SHA1              x86_64    2.12-2.el6               base     49 k
 perl-Encode-Detect            x86_64    1.01-2.el6               base     80 k
 perl-ExtUtils-MakeMaker       x86_64    6.55-144.el6             base    294 k
 perl-ExtUtils-ParseXS         x86_64    1:2.2003.0-144.el6       base     46 k
 perl-GSSAPI                   x86_64    0.26-6.el6               base     64 k
 perl-IO-Multiplex             noarch    1.13-1.el6               epel     24 k
 perl-IO-Socket-INET6          noarch    2.56-4.el6               base     17 k
 perl-IO-Socket-SSL            noarch    1.31-3.el6_8.2           base     70 k
 perl-IO-Zlib                  x86_64    1:1.09-144.el6           base     34 k
 perl-IO-stringy               noarch    2.110-10.1.el6           base     68 k
 perl-LDAP                     noarch    1:0.40-3.el6             base    354 k
 perl-MIME-tools               noarch    5.427-4.el6              base    247 k
 perl-Mail-DKIM                noarch    0.37-2.el6               base    121 k
 perl-Mail-SPF                 noarch    2.8.0-2.el6              epel    138 k
 perl-MailTools                noarch    2.04-4.el6               base    101 k
 perl-Net-DNS                  x86_64    0.65-5.el6               base    232 k
 perl-Net-LibIDN               x86_64    0.12-3.el6               base     35 k
 perl-Net-SSLeay               x86_64    1.35-10.el6_8.1          base    174 k
 perl-Net-Server               noarch    2.007-2.el6              epel    208 k
 perl-NetAddr-IP               x86_64    4.027-7.el6              base     96 k
 perl-Package-Constants        x86_64    1:0.02-144.el6           base     27 k
 perl-Razor-Agent              x86_64    2.85-6.el6               epel    119 k
 perl-Socket6                  x86_64    0.23-4.el6               base     27 k
 perl-Test-Harness             x86_64    3.17-144.el6             base    232 k
 perl-Text-Iconv               x86_64    1.7-6.el6                base     22 k
 perl-Time-HiRes               x86_64    4:1.9721-144.el6         base     49 k
 perl-TimeDate                 noarch    1:1.16-13.el6            base     37 k
 perl-Unix-Syslog              x86_64    1.1-3.el6                epel     28 k
 perl-XML-Filter-BufferText    noarch    1.01-8.el6               base    9.6 k
 perl-XML-LibXML               x86_64    1:1.70-5.el6             base    364 k
 perl-XML-NamespaceSupport     noarch    1.10-3.el6               base     17 k
 perl-XML-SAX                  noarch    0.96-7.el6               base     78 k
 perl-XML-SAX-Writer           noarch    0.50-8.el6               base     24 k
 perl-devel                    x86_64    4:5.10.1-144.el6         base    424 k
 portreserve                   x86_64    0.0.4-11.el6             base     23 k
 procmail                      x86_64    3.22-25.1.el6_5.1        base    162 k
 spamassassin                  x86_64    3.3.1-3.el6              base    1.1 M
 tmpwatch                      x86_64    2.9.16-6.el6             base     31 k
 unzoo                         x86_64    4.4-7.el6                epel     21 k

Transaction Summary
================================================================================
Install      71 Package(s)

Total download size: 169 M
Installed size: 205 M
Is this ok [y/N]: y
なにやら大量にずらずらと依存関係にあるソフトがインストールされます。
ログにある通り、Clam AntiVirusもセットでインストールされるようです。(Amavisデフォルトのウイルス対策ソフトとしてサポートされているため)
ただし、インストールされるだけで自動起動は無効になっています。使わない場合はなにも設定する必要はありません。
Amavisの設定
設定ファイルは「/etc/amavisd.conf」もしくは「/etc/amavisd/amavisd.conf」にあります。
CentOS6では「/etc/amavisd/amavisd.conf」にありました。
すでにclamdが起動している場合は先に停止しておきます。(OOM Killer対策)ついでに自動起動も無効にします。またClamSMTPでウイルスチェックしていた場合はそちらも停止します。
# /etc/rc.d/init.d/clamd stop
# chkconfig clamd off
# /etc/init.d/clamsmtpd stop
ではAmavisの設定していきます。
# vi /etc/amavisd/amavisd.conf
$myhostnameと$mydomainの設定
まずは$myhostnameと$mydomainを変更します。example.comは適宜読み替えてください。
# $myhostname = 'host.example.com';  # must be a fully-qualified domain name!
↓
$myhostname = 'example.com';  # must be a fully-qualified domain name!
$mydomain = 'example.com';   # a convenient default for other settings
↓
$mydomain = 'example.com';   # a convenient default for other settings
以下の設定をコメントアウト。
これでポート10025経由でウイルスチェックしたメールをpostfixに渡します。
# $notify_method  = 'smtp:[127.0.0.1]:10025';
# $forward_method = 'smtp:[127.0.0.1]:10025';  # set to undef with milter!
↓
$notify_method  = 'smtp:[127.0.0.1]:10025';
$forward_method = 'smtp:[127.0.0.1]:10025';  # set to undef with milter!
Sophos用のコメントアウトを解除。これでSSSPというウイルスチェック用のプロトコルが有効になります。
@av_scanners = (

# ### http://www.sophos.com/
# ['Sophos-SSSP',  # SAV Dynamic Interface
#   \&ask_daemon, ["{}", 'sssp:/var/run/savdi/sssp.sock'],
#           # or: ["{}", 'sssp:[127.0.0.1]:4010'],
#   qr/^DONE OK\b/m, qr/^VIRUS\b/m, qr/^VIRUS\s*(\S*)/m ],
↓
@av_scanners = (

### http://www.sophos.com/
['Sophos-SSSP',  # SAV Dynamic Interface
  \&ask_daemon, ["{}", 'sssp:/var/run/savdi/sssp.sock'],
          # or: ["{}", 'sssp:[127.0.0.1]:4010'],
  qr/^DONE OK\b/m, qr/^VIRUS\b/m, qr/^VIRUS\s*(\S*)/m ],
デフォルトで有効になっているClam AntiVirusの設定をコメントアウトして無効にします。
clamdとclamscanの2つの設定があるので注意。
  ### http://www.clamav.net/
  ['ClamAV-clamd',
    \&ask_daemon, ["CONTSCAN {}\n", "/var/spool/amavisd/clamd.sock"],
    qr/\bOK$/m, qr/\bFOUND$/m,
    qr/^.*?: (?!Infected Archive)(.*) FOUND$/m ],
  # NOTE: run clamd under the same user as amavisd - or run it under its own
  #   uid such as clamav, add user clamav to the amavis group, and then add
  #   AllowSupplementaryGroups to clamd.conf;
  # NOTE: match socket name (LocalSocket) in clamav.conf to the socket name in
  #   this entry; when running chrooted one may prefer a socket under $MYHOME.
↓
  ### http://www.clamav.net/
#  ['ClamAV-clamd',
#    \&ask_daemon, ["CONTSCAN {}\n", "/var/spool/amavisd/clamd.sock"],
#    qr/\bOK$/m, qr/\bFOUND$/m,
#    qr/^.*?: (?!Infected Archive)(.*) FOUND$/m ],
  # NOTE: run clamd under the same user as amavisd - or run it under its own
  #   uid such as clamav, add user clamav to the amavis group, and then add
  #   AllowSupplementaryGroups to clamd.conf;
  # NOTE: match socket name (LocalSocket) in clamav.conf to the socket name in
  #   this entry; when running chrooted one may prefer a socket under $MYHOME.
  ### http://www.clamav.net/   - backs up clamd or Mail::ClamAV
  ['ClamAV-clamscan', 'clamscan',
    "--stdout --no-summary -r --tempdir=$TEMPBASE {}",
    [0], qr/:.*\sFOUND$/m, qr/^.*?: (?!Infected Archive)(.*) FOUND$/m ],
↓
  ### http://www.clamav.net/   - backs up clamd or Mail::ClamAV
#  ['ClamAV-clamscan', 'clamscan',
#    "--stdout --no-summary -r --tempdir=$TEMPBASE {}",
#    [0], qr/:.*\sFOUND$/m, qr/^.*?: (?!Infected Archive)(.*) FOUND$/m ],
ウイルスチェックを有効にする。
# @bypass_virus_check_maps = (1);  # controls running of anti-virus code
↓
@bypass_virus_check_maps = (1);  # controls running of anti-virus code
Postfixからメールを受け取るポートの指定。デフォルトはポート10024ですが、今回はポート10025にします。
$inet_socket_port = 10024;   # listen on this local TCP port(s)
↓
$inet_socket_port = 10025;   # listen on this local TCP port(s)
設定が終わったら起動します。
# /etc/rc.d/init.d/amavisd start
正しく起動したら自動起動を有効にしておきます。
まずは有効か調べます。
# chkconfig --list | grep amavis
amavisd         0:off   1:off   2:off   3:off   4:off   5:off   6:off
clamd.amavisd   0:off   1:off   2:off   3:off   4:off   5:off   6:off
なにやらclamd.amavisdというのもデフォルトで登録されているようです。無効なので気にする必要は無いですが、気になるならdelオプションで消しときましょう。
# chkconfig amavisd on
# chkconfig --del clamd.amavisd
Amavis経由でSophos Anti-Virus for Linuxを利用する際のpostfixの設定
postfixでメールサーバを運用しclamdでウイルスチェックをしている前提で解説を進めます。メールサーバの立ち上げ方は過去の投稿でまとめたので参照してください。
このページではSophosの公式で解説されている設定に準じます。
# vi /etc/postfix/main.cf
まずはコンテンツフィルター用のポート設定です。
clamd用の設定をコメントアウトして無効化します。
# ClamSMTP用
# content_filter = scan:127.0.0.1:10025
# receive_override_options = no_address_mappings
続いてamavis用の設定を追加します。
# Sophos Anti-Virus amavisd-new用
content_filter=smtp-amavis:127.0.0.1:10025
続いてsmtpとsmtpdセクションでフィルタリング前後のインターフェイスと受信ポートについて定義します。
# vi /etc/postfix/master.cf
同じようにまずはclamd用の設定を無効化
# AV scan filter (used by content_filter)
#scan unix - - n - 16 smtp
#  -o smtp_send_xforward_command=yes

# For injecting mail back into postfix from the filter
#127.0.0.1:10026 inet n - n - 16 smtpd
#  -o content_filter=
#  -o receive_override_options=no_unknown_recipient_checks,no_header_body_checks
#  -o smtpd_helo_restrictions=
#  -o smtpd_client_restrictions=
#  -o smtpd_sender_restrictions=
#  -o smtpd_recipient_restrictions=permit_mynetworks,reject
#  -o mynetworks_style=host
#  -o smtpd_authorized_xforward_hosts=127.0.0.0/8
そしてamavis用設定を追加。smtpのサービス名はmain.cfのものと合わせています。Sophosの設定ではmaxprocの値は10になっていますが、メモリ消費を抑えるためAmavis側で実行するプロセスは2つなので、2にしています。
(-oの前にある行頭のスペースを削除しないように。一行として扱うためのスペースのため。たくさんのオプションがあるという意味。)
# Sophos Anti-Virus amavisd-new用
smtp-amavis unix - - n - 2 smtp

127.0.0.1:10026 inet n - n - 2 smtpd
 -o content_filter=
 -o local_recipient_maps=
 -o relay_recipient_maps=
 -o myhostname=localhost
 -o smtpd_helo_restrictions=
 -o smtpd_client_restrictions=
 -o smtpd_sender_restrictions=
 -o smtpd_recipient_restrictions=permit_mynetworks,reject
 -o mynetworks=127.0.0.0/8
Postfixを再起動します。
# /etc/rc.d/init.d/postfix restart
これでClam AntiVirusの代替としてSophos Anti-Virus for Linuxを使う設定は完了です。
Sophos Anti-Virus for Linuxの自動アップデート設定
Sophosには自動でアップデートを行う機能が備わっており、何らかの原因でアップデートができないと以下のようなメールがrootユーザー宛に届きます。(通知先は設定で変更可能)
[SAV-LINUX] Notice from Sophos Anti-Virus on example.com

An event happened on the computer example.com.

The threat data is out of date and should be updated.
このメールの頻度が異常に多く、10秒に一通くらいの頻度で届きますw
思わず「わかったわかったから」と言ってしまいました。
コマンドですぐにアップデートを行う場合は以下のコマンドです。
# /opt/sophos-av/bin/savupdate
しかし、上記のエラーメッセージを受け取っているということは正常に終了しないはずです。
アップデートの設定は以下のコマンドで修正できます。
# /opt/sophos-av/bin/savsetup
すると以下のような設問が表示されます。
Welcome to Sophos Anti-Virus interactive configuration


[1] Display update configuration

Configure primary update source:
[2] From Sophos
[3] From own server

Configure secondary update source:
[4] From Sophos
[5] From own server

[q] Quit
What do you want to do? [1]
[]の数字を入力してエンターで各種設定画面に移動します。
1の後にエンターで現在の設定を見ることができます。
2, 3はアップデート設定のプライマリー。最初に試されるアップデートということですね。アップデート用のサーバを別途用意している等でない限り、Sophosのサーバを経由させるので2を選びます。
Configuring primary update source to be Sophos.
Username for Sophos updates?
と、設問形式で聞かれます。
「アクティベート用のIDとパスワードは登録時のメールにあるLicense_Schedule-[InvoiceNumber].pdfというファイルに添付されてくる」と公式の解説にはありますが、そのようなメールは届きませんでした。どうしたものかと調べていると以下のURLにアクセスしてダウンロードしたファイルのIDとパスワードを利用する方法もあると発見。
https://amicreds.sophosupd.com/freelinux/creds.dat
中身を見ると以下のようにUsernameとPasswordが記載されています。(値はダミー)
username=FAVL595C56779
password=g94qt1656153
この情報を入力します。
最後に以下の設問。通常はプロキシ経由出ないと思うのでデフォルトのNoのままエンター。
Do you need a proxy to access Sophos updates? Yes(Y)/No(N) [N]
すると無事にアップデートが行えるようになります。
設定した内容が気になるようなら再度コマンドを実行して1で内容を確認してください。以下のようになっているはずです。
Primary update cache path = /opt/sophos-av/update/cache/Primary
Primary update source username = FAVL595C56779
Primary update source password = ********
Update period minute = 60
これでsavupdateコマンドでアップデートを実行してください。
無事にアップデートが完了するはずです。無事にアップデートができると以下のようなログが流れます。
Updating from versions - SAV: 9.16.0, Engine: 3.77.1, Data: 5.66
Updating Sophos Anti-Virus....
Updating Talpa Binary Packs
Updating SAVScan on-demand scanner
Updating Virus Engine and Data
Updating Talpa Kernel Support
Updating Manifest
Selecting appropriate kernel support...
Update completed.
Updated to versions - SAV: 9.16.0, Engine: 3.77.1, Data: 5.73
Successfully updated Sophos Anti-Virus from sdds:SOPHOS
テスト用のウイルスメールを送信してウイルスチェックが正しく動作するかテスト
最近ではほとんどのPCで常時ウイルス対策ソフトが稼働しているため、テスト用であってもウイルスファイルを保存することはできません。(セキュリティを緩めれば可能ですが)
また、プロバイダやメールサービスもセキュリティ対策が取られているため、ウイルスを添付したメールをテストで送ることは困難です。
そこで、サーバ上で擬似的にメールを送信してウイルスチェックが正しく行われるかテストします。
# vi av.txt
テスト用に以下の内容を書き込み保存します。これはEICARというテスト用ウイルスです。ウイルス対策ソフトが正しく動作するか調べるためのもので、実際には動作しないので安心してください。
X5O!P%@AP[4\PZX54(P^)7CC)7}$EICAR-STANDARD-ANTIVIRUS-TEST-FILE!$H+H*
-aオプションで添付ファイルを指定、mailコマンドで送信します。hoge@example.comの部分は適宜置き換えてください。
# mail -s "A/V test example" -a av.txt hoge@example.com < /dev/null
正しく設定ができていれば以下のようなメールが届くはずです。
A threat was detected during an on-demand scan. Details follow:
2 files scanned.
Number of infections detected: 2
Number of infected files detected: 2
/var/spool/amavisd/tmp/amavis-20200325T050020-16336-Ad5lAP9i/parts/p003 is infected with EICAR-AV-Test.
/var/spool/amavisd/tmp/amavis-20200325T050020-16336-Ad5lAP9i/parts/p001 is infected with EICAR-AV-Test.
メールのヘッダーにも以下のように表示されます。
X-Virus-Scanned: amavisd-new at example.com
動作を確認したらテスト用のウイルスファイルを削除してください。
# rm av.txt
スパムメールの場合
Amavisはウイルス対策だけでなく、スパムメール等も予防することが出来ます。
スパムメールが届くとメールタイトルに「***Spam***」というタグが追加されます。
これはAmavisの以下の設定で制御しています。
$sa_spam_subject_tag = '***Spam*** ';
スパムの判定は以下のサービスを利用しています。
'spamassassin.apache.org' => -3.0,
Apache SpamAssassinはオープンソースのスパムフィルタリングサービスです。
全てのスパムメールを判定してくれるわけではありませんが、無料のサービスなのでありがたく利用させていただきましょう。
Cronで決められた間隔でウイルスチェックを行う方法
リアルタイムチェックはハードルが高いけど、たまには全体のウイルスチェックをしたいという場合はCronで実行するのが簡単です。
Clam AntiVirusのclamdscanで利用していたスクリプトを改造すれば簡単に実装できます。
週に一度の検査で十分なのでcron.weeklyにファイルを作成しました。
# vi /etc/cron.weekly/sophos.sh
以下のように作成しました。
#!/bin/bash
PATH=/usr/local/sbin:/usr/local/bin:/sbin:/bin:/usr/sbin:/usr/bin:/opt/sophos-av/bin

SAVSCANTMP=`mktemp`

savscan / -remove -nc > $SAVSCANTMP 2>&1

[ ! -z "$(grep found $SAVSCANTMP)" ] && \
grep found $SAVSCANTMP | mail -s "Virus Found" info@example.com

[ -z "$(grep found $SAVSCANTMP)" ] && \
echo "savscan normal end" | mail -s "Virus Not Found" info@example.com

rm -f $SAVSCANTMP
簡単に解説するとSAVSCANTMPというテンポラリファイルにsavscanの結果を代入。ウイルスが見つかったときのfoundという文字列をフラグに管理者へメールを送信するというスクリプトです。正しく動作しているか調べるために、ウイルスが見つからなかったときの設定も追加しています。
オプションの「-remove」は見つかったときにウイルスを自動で削除する設定。「-nc」はウイルスが見つかったときに設問を表示しないという設定です。
savscanでは検査する対象の拡張子は限定されています。上で作成したav.txtは拡張子がtxtなので検査しません。すべてのファイルを検査するには「-all」オプションを指定する必要があります。(ただし圧縮ファイルなども検査するようになるのでかなり時間がかかります)
デフォルトで検査対象の拡張子は「-vv」オプションで調べることができます。
「-vv」の実行結果は以下のとおりです。
Default executable extensions:

386, 3GR, ADD, ASP, ASPX, CHM, CMD, COM, CPL, DLL, DMD,
DOC, DOT, DRV, EXE, FLT, FON, FOT, I13, IFS, MOD, MPD,
MSO, OCX, OV?, PDR, SCR, SYS, VXD, XL?, VB?, INI, MPP,
MPT, HLP, HT?, SRC, SHS, SHB, PRC, PPS, PPT, POT, PIF,
HTML, WBK, LNK, BAT, SH, PL, EML, NWS, RTF, DBX, PDF,
SWF, JS, JSE, ZIP, WSF, VS?, WMF, JPG, JPEG, CAB, XSN,
ASX, JPZ, ANI, INF, MUI, DOCM, DOCX, PPTM, PPTX, XLSM, XLSX,
WMA, PHP, ZIPX, JAR, CLASS, DEX, LSP, FAS, MNL, VLX, O,
TIF, TIFF, PS1, PSM1, SCT, XSL
設定が完了したら実行権限を付与します。
# chmod 700 /etc/cron.weekly/sophos.sh
エラーが出る場合の対処法
maillogに以下のエラーが出ている場合はメールのフィルタリングが正しく行われていません。
転送用のサービス名が間違っていないか確認してください。
Mar 19 20:17:47 example postfix/error[26734]: 5FCA1AAE19E: to=<hoge@example.com>, relay=none, delay=60880, delays=60880/0.08/0/0.37, dsn=4.3.0, status=deferred (mail transport unavailable)
以下のエラーの場合はポートが正しく設定されているか確認してください。
Mar 20 03:36:43 example postfix/smtp[21879]: 4C30AAAC5AA: to=<hoge@example.com>, orig_to=<hoge@example.com>, relay=none, delay=1.2, delays=1.2/0.02/0/0, dsn=4.4.1, status=deferred (connect to 127.0.0.1[127.0.0.1]:10025: Connection refused)
以下のログが出る場合はipv6への対応ができていない(またはipv6がブロックされている)ことが原因のようです。
Mar 20 03:46:56 example amavis[23213]: (!)Net::Server: 2020/03/20-03:46:56 Can't connect to TCP port 10025 on ::1 [Cannot assign requested address]\n at line 68 in file /usr/share/perl5/vendor_perl/Net/Server/Proto/TCP.pm
この場合はperl-IO-Socket-INET6というパッケージを削除する必要があります。rpmだと依存関係にあるものも削除されてしまうので、nodepsオプションを付けます。
# rpm -e --nodeps perl-IO-Socket-INET6
以上、PostfixのウイルスチェックにSophosを利用する方法の解説でした。
昔に比べるとOOM Killerになることは減りましたが、サーバのリソースが有限であることには代わりはありません。Sophosを利用して余裕を持ったサーバ運営を心がけたいものです。

 ClamAVとClamSMTPを利用してPostfixのメールをウイルスチェック
 メールサーバが「451 Local Error」を返した際の対処法
 サーバのログを監視するSwatchの導入方法と使い方を解説
 無料で使えるLinuxのアンチウイルスソフト「Clam AntiVirus」の導入と設定の解説
 GMO VPSを契約してWordPressを安定動作させるまでのサーバ設定方法
 OpenSSLとプライベートCAでメールサーバ用の秘密鍵と公開鍵証明書を作成
 Linuxでサーバを構築するに当たって必要になる基礎知識













このソフトがsophosの公式サイトから消されましたね……
どうやらサポートを打ち切ったようです、ただソフト自体は2023年ぐらいまで使えるみたい?
貴重な情報ありがとうございます。
素晴らしいソフトなんですが、いかんせん知名度が低く、利用者が増えなかったのもかもしれませんね。